Did you know it only takes 20 minutes to start a blog with Siteground?
I had web designer friends and they always made it look like it would be very complicated to have a website. Everything sounded very technical to me. And if you wanted to get somebody to build it for you, it was also very expensive.
But when I started looking into starting my own blog, I was pleasantly surprised.
It turns out that it's not that difficult to start a blog and you don't need to be very techy either.
More...
Would you do me a favour?
Would you mind sharing it on Pinterest so it can reach more people?
Thank you!
[Disclaimer: Some links in this post contain affiliate links. This means I get a commission if you purchase the product through my link at no extra cost to you. As an Amazon Affiliate I earn from qualifying purchases.]
Before you start your wordPress blog
I am sure you already have an idea about what you want to blog about, but if you don't or are not sure, here are a couple of tips:
The first thing you need to do is to choose a niche and decide your purpose.
Tip 1: Do something you really like or something you're an expert in. It's easier to find your motivation or to know what you will talk about.
For example: Aromatherapy for beginners for moms
It's important to know the people you are trying to help because it makes it easier to come up with content they want. It also helps you decide how you will talk to them and how to reach them.
Fill in the blanks in this sentence to have a clearer idea: I help ________ to ________ so __________.
For example: I help NEW MOMS to LEARN THE BASICS OF AROMATHERAPY so THEY CAN CREATE THEIR OWN RECIPES TO CARE FOR THEIR BABIES AND FAMILY.
This is pretty basic, but it gives you an idea.
It doesn't matter if you have to change it later, this might evolve as you learn more about your readers and what blog posts are the most popular.
Then you will have to decide what to call your blog.
Choose a domain name
To choose your domain name, the most practical options are to:
1. Choose your name:
This is perhaps the easiest one. It also allows you to change what you do slightly and still keep getting people to your website. So if your niche changes a bit or you do a few different things that complement your blog, you can still use the same domain name.
2. Choose a name that represents what you do
So for the aromatherapy example, something like www.essentialmama.com or www.aromatherapyformums.com would work.
How to search for domain names
If you are not sure what to call your blog, write a few ideas and then do a search BEFORE you buy your domain name.
You can Google a few of your names and see if your name is already being used or what types of websites come up in the search.
I also like to use a tool like Panabee.com because it tells you whether your domain name is taken and it gives you alternatives.
But most importantly:
DON't do a search in a domain name provider if you don't intend to buy immediately.
If you don't get your domain and go back a couple of days later you might find that somebody else has snatched your domain.
Once you have chosen your domain name, it's time to start your blog.
How to start a blog with SiteGround
Go to SiteGround and follow these steps.
It's much easier than it sounds, and it won't take you long to do it.
STEP 1: Select a WordPress managed hosting plan
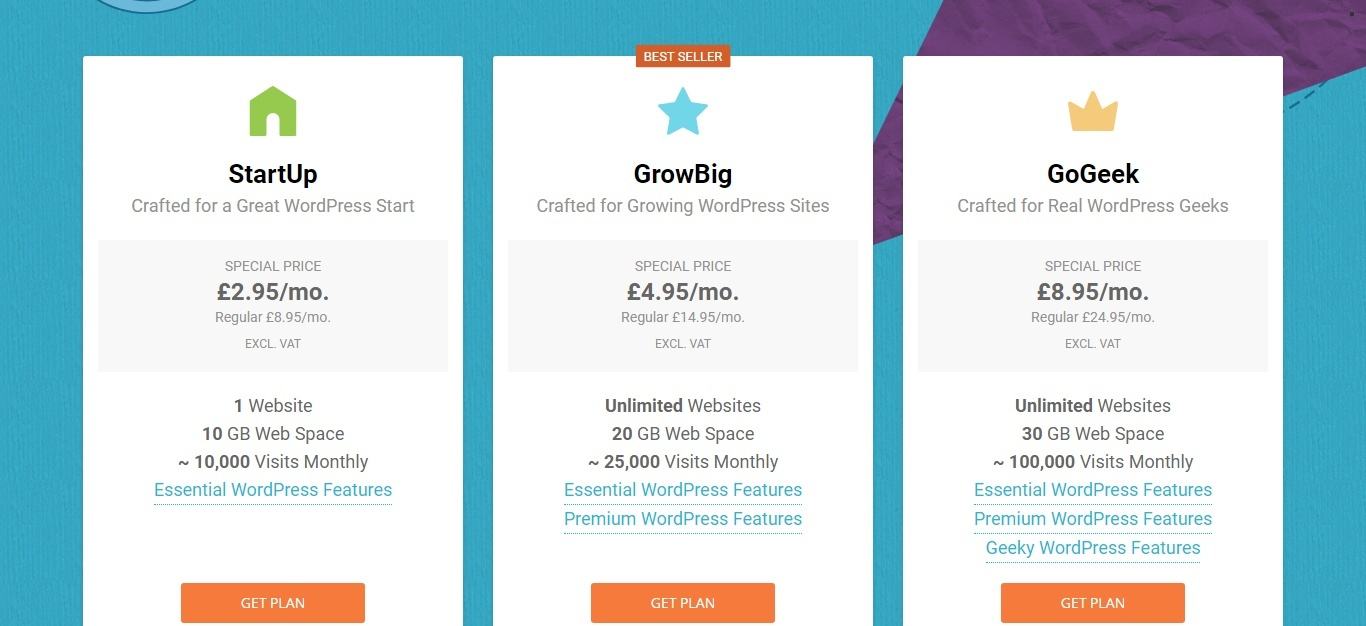
If you are a beginner, the Startup plan will do until you get lots of views to your blog.
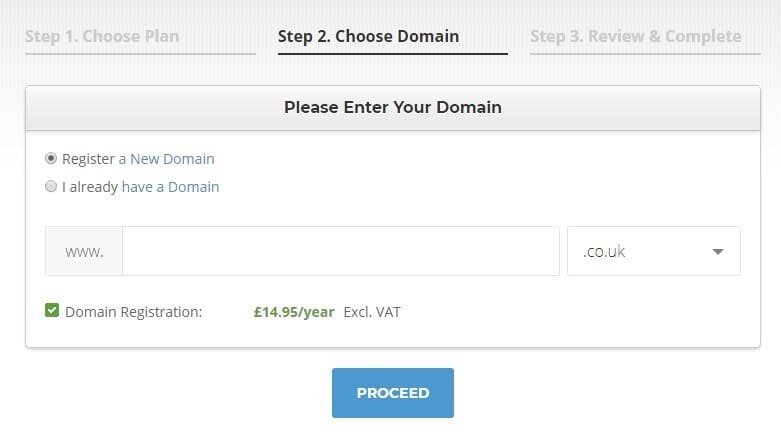
Step 2: Choose your domain
If you haven't paid for your domain already, you can register a domain with SiteGround themselves.
I have been told that having your domain name and your webhosting with the same provider is not recommended, though. And you can get a cheaper deal if you get it somewhere else.
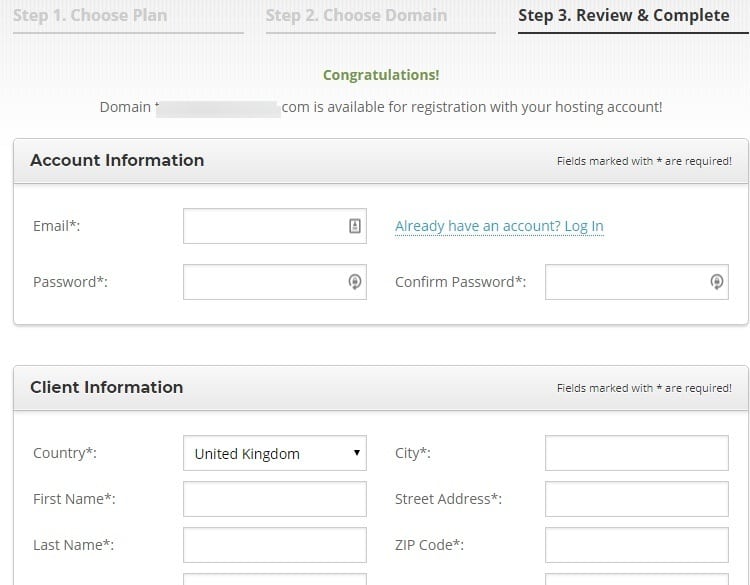
Step 3: Fill in your information
Here you add your details, your username and password, and select your hosting period. I'd recommend you get the 3 year period.
The cheap discount is only available to new customers, so you want to get the cheapest deal for the longest period of time.
Once this period is over, the price goes back up.
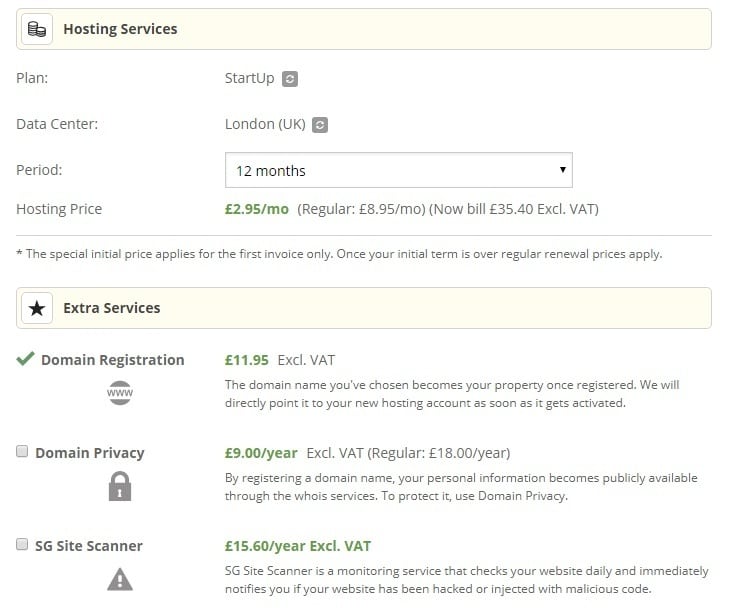
A word about SiteGround's Extra services:
You don't have to take any of these but if you don't want to get people ringing you and spamming you for weeks and weeks with offers to design your website or whatever, you need to pay for domain privacy.
Step 4: Install WordPress
Once you have registered and paid for your webhosting you will receive an email with further instructions to use Siteground's Wizard to install WordPress.
It's pretty easy to do:
Log in and go to My accounts:
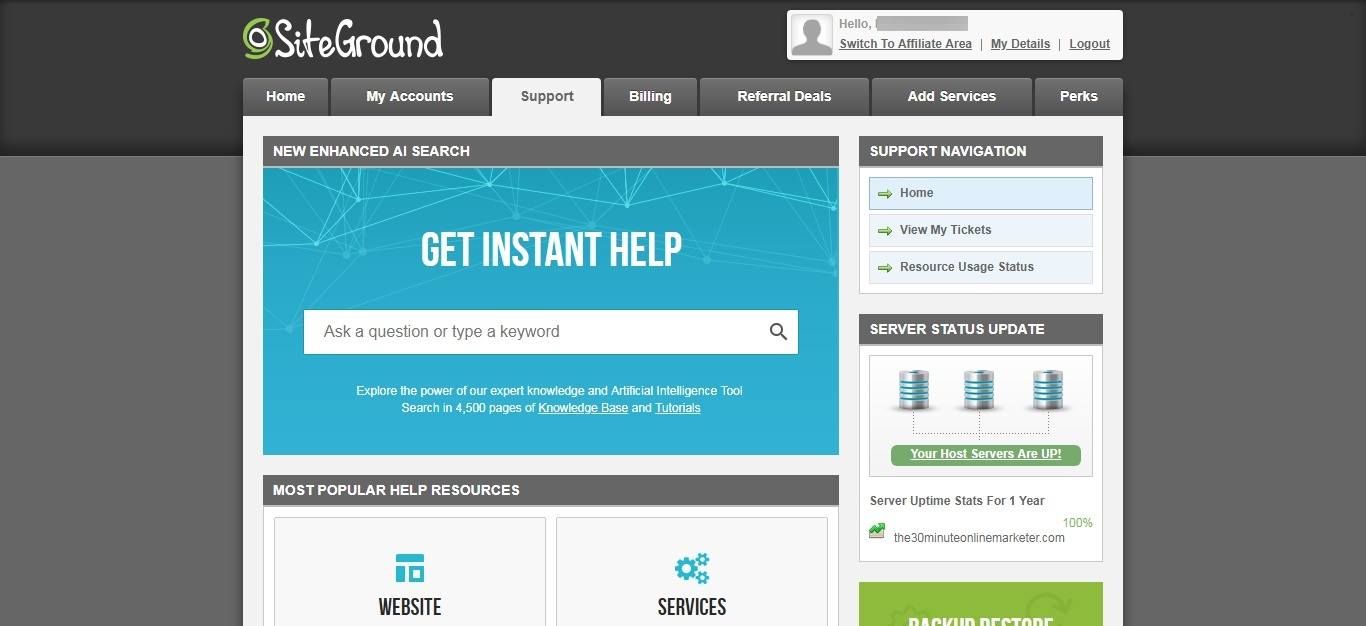

Then go to Autoinstallers and click on WordPress.
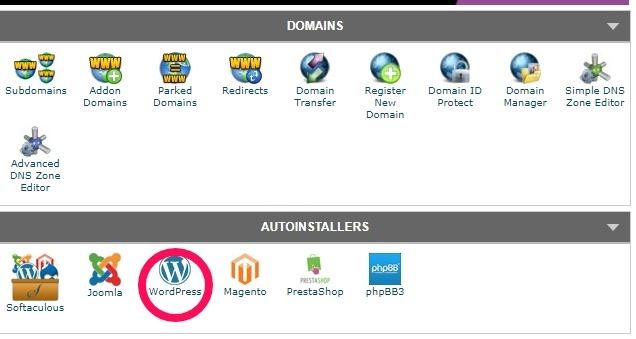
Then Click Install and do a Quick Install.
Choose your domain, Leave Directory blank and add your admin username and password.
If you are struggling for whatever reason or you'd rather somebody else does this for you, you can get one of Siteground's support staff to help you. Go to Support and Open a chat.
Once WordPress has been installed you should now be able to go to your site and log in.
So to go www.yourdomainname.com/wp-admin and log in using your username and password.
Step 5: Install a theme
I don't think it's necessary to get a paid theme at this stage. Your WordPress should have 2 or 3 themes already installed that you can use while you learn how everything works.
But if you want to get started with a Premium Theme check out my favourite places for WordPress Themes.
>>> You'll love this blog post with the most beautiful themes for female bloggers <<<
When you have purchased and downloaded your theme, you install it like this:
Go to Appearance:

Then Themes, and Add New.
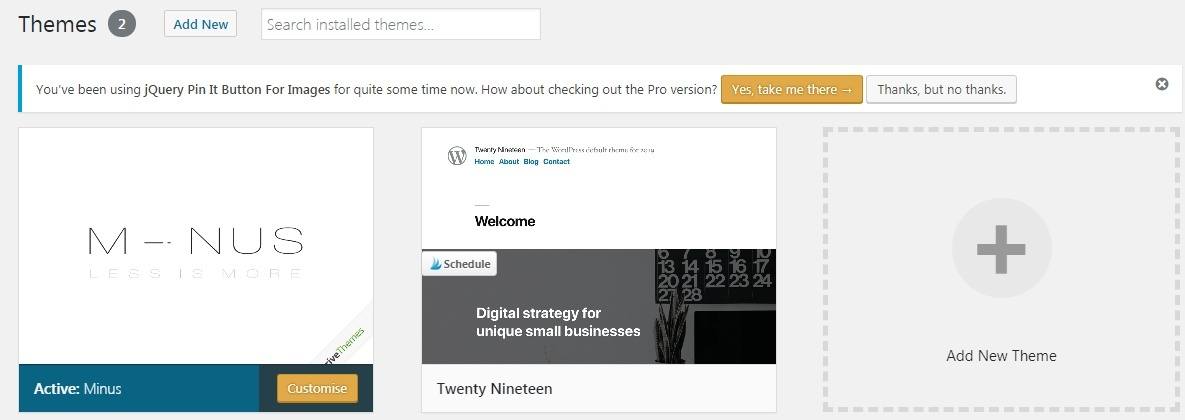
When it's uploaded, activate it.
Customising your theme
You don't have to touch your theme yet. In fact, I'd advise you to wait until you become more familiar with WordPress and all the options.
But you can customise a few things easily enough.
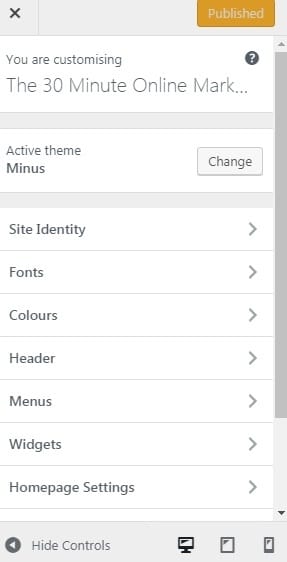
If you are still on the Themes screen, you can click the Customise button on your theme.
If you are somewhere else, go to Appearance and click on Customise.
Since you're not familiar with the way everything works, focus on customising your Site Identity to add your Title, Tagline and Logo. Then do Fonts, Colours.
You can work with your Header, Menus, etc. later on, when you have a structure for your blog.
Step 6. Install your Plugins
You are going to need plugins to take care of website security, optimise the database, do backups, etc.
To install a plugin, go to Plugins > Add New and do a search for each plugin.
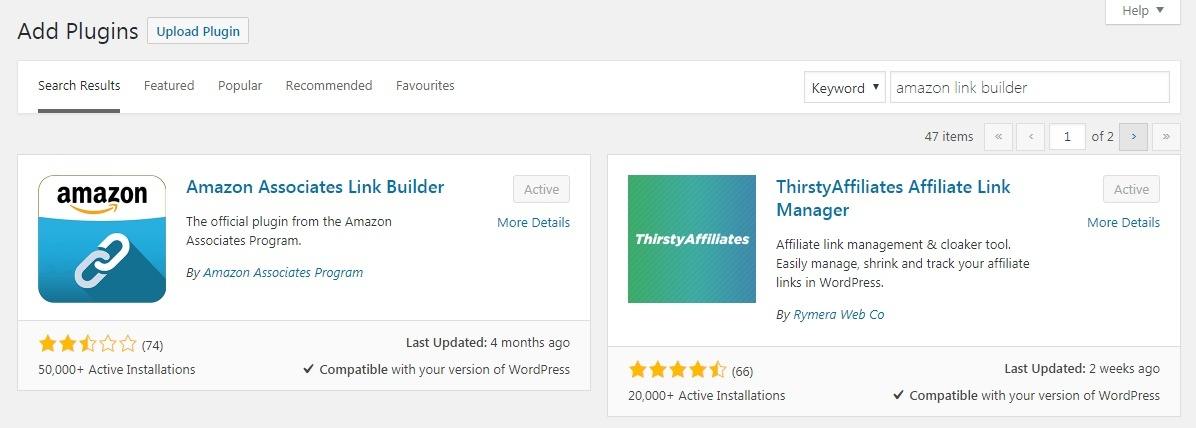
Click Install and once it's installed click Activate.
You might have to adjust settings for some plugins, but they're usually pretty straight forward.
Step 7. start blogging
You can add new pages and new posts by going to Pages > Add New and Posts > Add New and start writing. It's that simple.
Once you add a new blog post or page, you will get this screen showing you the editor.
Enter your title and start writing.
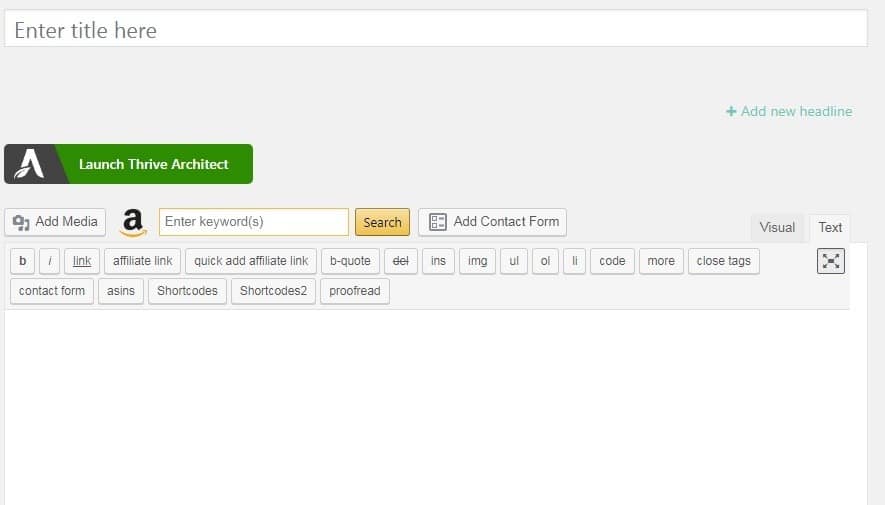
Notice I am not using Gutenberg, so it looks different to yours.
Some tips for writing your first blog post
Writing a blog post is not like writing other texts like essays, letters or book chapters.
You need to make it easy to read and make the blog post attractive or people will stop reading and leave your site.
Here are some tips for writing your first blog post.
- Plan your blog post and create an outline.
- Use ProWritingAid to avoid typos and errors.
- Use HEADERS to separate sections.
- Include images or videos every 300 words or so to illustrate what you are saying or to break up the text.
- Link to other sites and articles.
- Make your paragraphs short so they're easier to read on a screen.
- Give tips.
- Use Calls to Action.
- Include affiliate marketing products.
- Use lists.
- Add at least one opt-in form.
- Edit your blog post by following the changes suggested by Rank Math (alternative to Yoast), until most of the things in the list are green.
And to finish...
When your blog post is complete, hit publish:
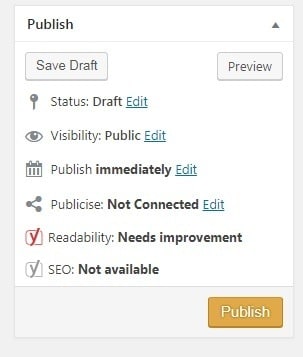
See? It's a lot easier than what people think.
If you liked this blog post you'll also like these:


